Python Pillow を使った画像の合成

Python、Pillow を使って画像を合成してみました(画像はいらすとやさんから)。
まず、Pillow をインストールします。
pip install pillow
画像の読み込みから、リサイズ、貼り付けまで、以下のサイトを参考にしました。
img

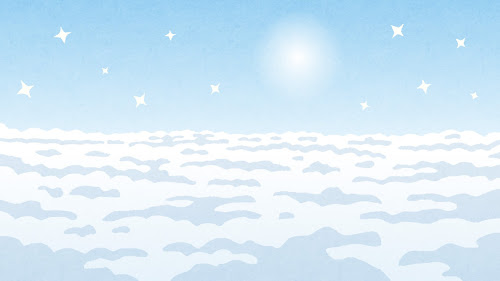
background_img
from PIL import Image, ImageDraw

def scale_to_width(img, width):  # アスペクト比を固定して、幅が指定した値になるようリサイズする関数。
    height = round(img.height * width / img.width)  #横幅からアスペクト比をもとに高さを計算
    return img.resize((width, height))  #リサイズし、return

img = Image.open("path/to/character_angel.png")

img.load()
image = Image.new("RGB", img.size, (255, 255, 255))
image.paste(img, mask=img.split()[3])
image.save("out_img.jpg","JPEG",quality=95)

out_img = Image.open("out_img.jpg")

background_img = Image.open("path/to/bg_heaven_tengoku.jpg")

img_resized = scale_to_width(out_img, 200)

mask = Image.new("L", img_resized.size, 0)  #img_resizedと同サイズでLモードの画像を生成
draw = ImageDraw.Draw(mask)  #maskの描画変数
draw.ellipse((0, 0, 200, 200), fill=255)  #円を描画(left,upper,right,lower)で示す長方形に内接する円になる
mask.save('mask_circle.jpeg', quality=95)

background_img.paste(img_resized, (150, 20), mask) # 合成。第二引数は、貼り付ける位置。
background_img.save("final.png")

# background_img.save("final.jpeg", quality=95 )
合成された画像がこちら。

以下のコードがないと、天使の背景が真っ黒になってしまいました。天使の背景が透過のためかもしれません。
img.load()  # required for png.split()
image = Image.new("RGB", img.size, (255, 255, 255))
image.paste(img, mask=img.split()[3])   # 3 is the alpha channel
image.save("out_img.jpg","JPEG",quality=95)
元画像と同じサイズの真っ白なRGB画像を作成
RGBA画像をRGB+Aに分離
RGB成分を1.で作成した真っ白なRGB画像にペースト
こうなるΣ( ̄ロ ̄lll)ガーン

最後に保存する画像は、png でも jpeg でもどちらでも問題ありませんでした。
コード内のscale_to_width関数で使われている round 関数は、指定した桁数で数字を丸めるためのものです。
せっかく天使の画像が透過画像なので、次は背景に透過画像のまま貼り付けてみます。
from PIL import Image

back = Image.open("bg_heaven_tengoku.jpg").convert('RGBA')
image = Image.open("character_angel.png").convert('RGBA')

back.resize((1000,1000))
image.thumbnail((100,100))

mask = image.copy()  ## サイズ変更しただけの元画像をmaskとしてコピーする
image.putalpha(255)

image_clear = Image.new('RGBA',back.size,(255,255,255,0))
back.paste(image,(250,50),mask)  ## 透過率を変更していない元画像のアルファチャンネルをmaskに指定
back = Image.alpha_composite(back,image_clear)

back.show()

back.save("final.png")
結果
こちらの記事を参考にしました。
pillow で透過画像をリサイズや、透明化すると背景が透過しなくなってしまう
Pillow の resize と thumbnail の違いについて
resize
Image.resize(size, resample=3, box=None, reducing_gap=None)
サイズを変更したコピーを返す
Parameters
size: 変更したいサイズ (width, height)
resample: リサンプリングフィルタ (デフォルトは PIL.Image.BICUBIC)
- PIL.Image.NEAREST
- PIL.Image.BOX
- PIL.Image.BILINEAR
- PIL.Image.HAMMING
- PIL.Image.BICUBIC
- PIL.Image.LANCZOS
box: リサイズする画像の領域。長方形の領域のみ指定できる 未指定の場合、画像全体
例: box=(100, 100, 300, 300)
reduce_gap: 段階的に画像サイズの変更、最適化をさせる (デフォルト: 2.0)
戻り値
Image object
thumbnail
Image.thumbnail(size, resample=3, reducing_gap=2.0)
アスペクト比を維持しながら、指定したサイズ以下の画像に縮小させる
- 例: 550x550の正方形画像に(600, 400)を指定した場合、400x400 となる
Parameters
size: 指定したsize以下に縮小する (width, height)
resample: リサンプリングフィルタ (デフォルトは PIL.Image.BICUBIC)
- PIL.Image.NEAREST
- PIL.Image.BOX
- PIL.Image.BILINEAR
- PIL.Image.HAMMING
- PIL.Image.BICUBIC
- PIL.Image.LANCZOS
reduce_gap: 段階的に画像サイズの変更、最適化をさせる (デフォルト: 2.0)
戻り値
なし(破滅的なメソッド)
マスキングについて
paste関数には第三引数がありマスク画像を指定することができる。
bg.paste(image,(x_length,y_length),mask)のように第三引数を増やしてあげればよいです。
マスク画像として使用できるのは、貼り付け画像と同じサイズでmodeが以下の三種類の場合です。
- 1: 1bit画像(二値画像)
- L: 8bitグレースケール画像
- RGBA: アルファチャンネルを持った画像
例えば、マスク画像が8bitグレースケール(mode=’L’)の場合、0(黒)ではベース画像(bg)が100%、255(白)では貼り付け画像(image)が100%、中間値では2つの画像が値に応じてブレンドされます。
Pillow の mode について
All modes supported by python pillow
1 (1-bit pixels, black and white, stored with one pixel per byte), the value is in 0-1.
L (8-bit pixels, black and white), the value is in 0-255.
P (8-bit pixels, mapped to any other mode using a color palette), the value is in 0-255.
RGB (3×8-bit pixels, true color), the value is in [0-255, 0-255, 0-255].
RGBA (4×8-bit pixels, true color with transparency mask), the value is in [0-255, 0-255, 0-255, 0-255]
CMYK (4×8-bit pixels, color separation)
YCbCr (3×8-bit pixels, color video format)
LAB (3×8-bit pixels, the Lab color space)
HSV (3×8-bit pixels, Hue, Saturation, Value color space)
I (32-bit signed integer pixels)
F (32-bit floating point pixels)
LA (L with alpha)
PA (P with alpha)
RGBX (true color with padding)
RGBa (true color with premultiplied alpha)
La (L with premultiplied alpha)
I;16 (16-bit unsigned integer pixels)
I;16L (16-bit little endian unsigned integer pixels)
I;16B (16-bit big endian unsigned integer pixels)
I;16N (16-bit native endian unsigned integer pixels)
BGR;15 (15-bit reversed true colour)
BGR;16 (16-bit reversed true colour)
BGR;24 (24-bit reversed true colour)
BGR;32 (32-bit reversed true colour)
We can get and convert image mode in python pillow. Here is the tutorial:
Python Pillow Get and Convert Image Mode: A Beginner Guide – Python Pillow Tutorial
Understand Python Pillow Image Mode: A Completed Guide – Python Pillow Tutorial
お薦め記事/動画
安倍晋三銃撃事件で浮かび上がった「123=ひふみ=国常立尊」 中国共産党は統一教会を通じて日本人から莫大な富を搾取していた!!
政府がコロナワクチン4回目接種の対象者を全医療従事者や高齢者施設の職員に拡大する一方、副反応の危険性を知り、接種を拒否する国民が続出
人類の救いのために24時間働かれているRAPTさんは、どこまでも神様から祝福され、力に満ち溢れている!!(十二弟子・ミナさんの証)
神様のRAPTさんに対する爆発的な愛が伝わってきた不思議な体験 神様に深く愛される人こそ、この世で最も幸福な人生を歩むことができる(十二弟子・エリカさんの証)